

Google Nexus 7 Factory Image
The great Nexus 7 ordeal of 2013 is now over later Qualcomm manifestly agreed to the release of the factory image and all necessary drivers, but a day later lots of hubbub had been fabricated about this touchy and unpleasant state of affairs. Awesome, so now nosotros have access to the factory paradigm, pregnant we tin can restore the tablet back to stock no matter what happens to the software on it.
Say, you had a bad flash and are now boot-looping. Or your dog installed a custom ROM but Android iv.99 came out and you desire to update ASAP. This is where this guide is going to come up in handy. The instructions aren't any different from the usual manufacturing plant image installation procedure but they apply specifically to the 2013 Nexus 7, so you tin can rest assured you're not following some generic guide that may not piece of work on your device. Additionally, I've seen many variations of the steps necessary to preserve your information, and I call back this is the most optimal mode to go.
Note #1: If your bootloader is locked, your information will exist wiped for security reasons - in that location's no way around that. Y'all will desire to support what you want manually.
Note #2: If your bootloader is already unlocked, you have the option of skipping the data wipe during the manufacturing plant image flashing procedure. In some situations, not wiping user data may prevent the Nexus 7 from booting, in which case you lot'd probably need to go alee with the wipe, but for unproblematic OS upgrades from one version of stock Android to another one higher, wiping data should non be necessary.
Notation #3: You can root your Nexus 7 in the last stride if yous desire.
[disclaimer1]
Prerequisites
In club to complete the steps beneath, you lot need to have the Android SDK installed. The SDK contains the latest version of adb and fastboot, which y'all volition need for flashing files and issuing commands. You will likewise demand a MicroUSB cable to execute adb sideload, fastboot flash, and other commands. Y'all too need to unlock your bootloader - a process that wipes your data.
Enable Programmer options past going to the Settings -> About screen and tapping Build number until the Bone unlocks the hidden Developer options menu. At present go to Developer options and make sure yous take USB debugging turned on. For security purposes, you tin can turn information technology off after we're done.
To unlock the bootloader, if y'all haven't already washed so:
- Reboot into the bootloader by issuing an adb reboot bootloader command on your estimator or holding VolDn+Ability while booting (power off, agree VolDn, and then hold Power).
- Warning: This will wipe your data. Blazon in fastboot oem unlock on your computer. Agree to the unlock past selecting Yes on your tablet (VolUp, then Power).
- You lot have now unlocked your bootloader (and the data partition was wiped clean). Verify by rebooting to the bootloader again and looking at Lock Land.

The Steps
- Download the full manufacturing plant epitome corresponding to your exact model (for case, 2013 Nexus 7 Wi-Fi is razor), which includes the total system, bootloader, recovery, kernel (kick.img), and radio (radio not included for Wi-Fi-just variants). It's a make clean slate for these components - they'll wink cleanly over annihilation you lot have now.
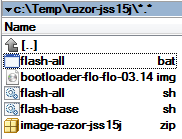
- Unpack the tgz (tar/gz) archive into its own directory. I apply Total Commander, but you can employ whatever tool that reads gz and tar, like 7-Nada:
- Proceed with this footstep if you want to go on your information intact. If you skip this step, your data will be wiped. With your favorite text editor, edit (be careful non to run it by blow instead of editing) flash-all.bat (if you're on Windows) or flash-all.sh (Mac, Linux) and remove "-westward" from the fastboot update command. For case, if the line reads fastboot -w update image-razor-jss15j.aught, it should now read fastboot update image-razor-jss15j.zip. The -w option instructs fastboot to wipe data.
- Reboot into the bootloader and run the appropriate flash-all script:
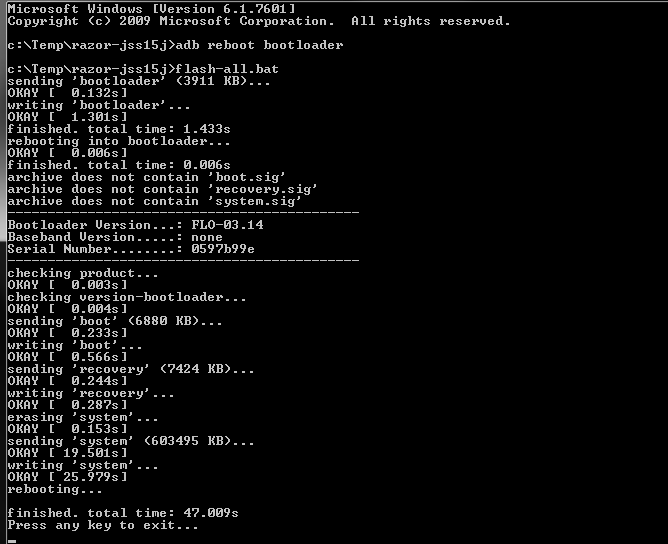
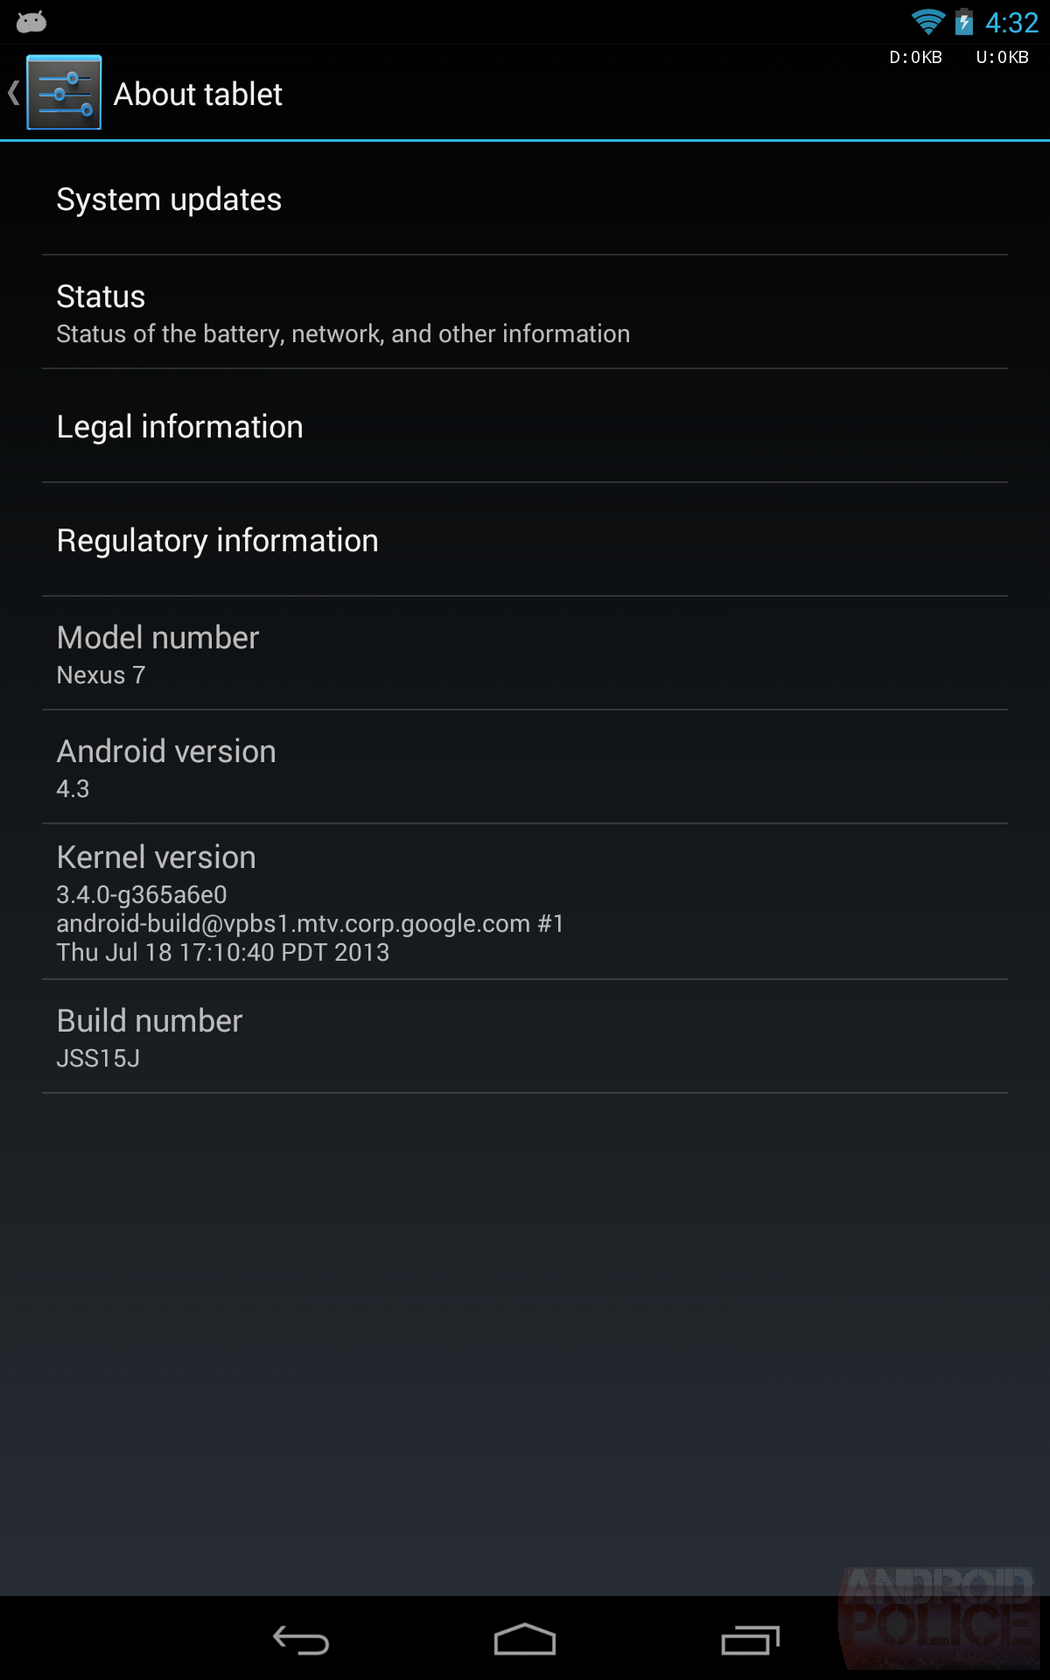
That'south it, yous're done. In my case, the Nexus 7 is at present running stock Android four.3:
Note: The above process restored the manufactory recovery, and so if you want a custom 1, you can flash one now (see below).
For better security, you tin can relock the bootloader past issuing fastboot oem lock while booted to the bootloader. This will, all the same, hateful that if you ever want to exercise anything that requires an unlocked bootloader, you will lose your information in the unlock procedure.
Rooting
Rooting a Nexus 7 is very easy. It requires an unlocked bootloader and a custom recovery. I recommend using TWRP.
- Flash TWRP from here (Reboot into the bootloader as before and and so fastboot flash recovery FILENAME.img).
- Reboot into recovery (adb reboot recovery or hold VolUp and Power while booting).
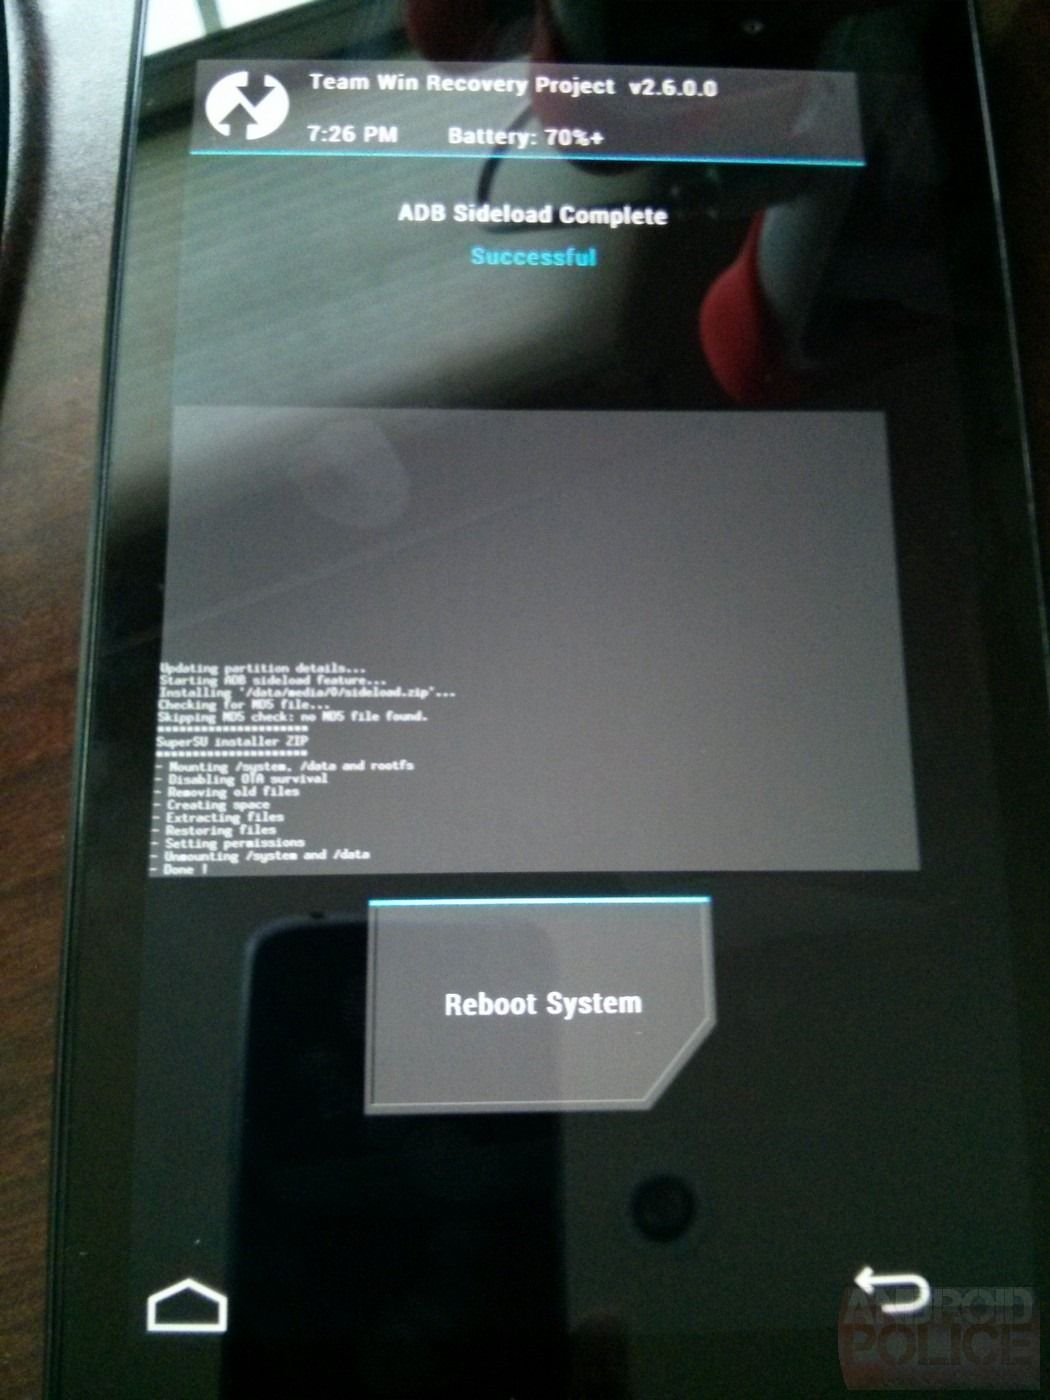
- Flash SuperSU from this post. To do that, download the cipher, then put the recovery into adb sideload manner (in TWRP, it's nether Advanced), and and then do adb sideload FILENAME.zip. I've seen some people mutter that doing and so via CWM doesn't work, only flashing through TWRP and selecting Set up Superuser Permissions at the end does the trick.
- You should be rooted.
- Reboot, head to the Play Shop, and update SuperSU.
Source: https://www.androidpolice.com/2013/08/10/how-to-restore-your-2013-nexus-7-back-to-stock-using-a-full-factory-image-and-root-it/
Posted by: childfrichis.blogspot.com
0 Response to "Google Nexus 7 Factory Image"
Post a Comment